Category:
How To Flush Hydraulic Fluid Safely and Effectively
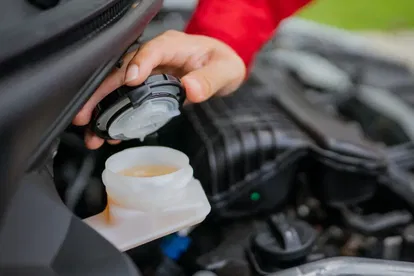
Heavy-duty equipment and machinery require hydraulic fluid in order to function. Proper maintenance and upkeep require machine operators to perform a routine hydraulic fluid flush, but unexpected breakdowns and emergency shutdowns can increase those intervals.
Use the step-by-step guide below to learn how to flush hydraulic fluid properly and keep your equipment running for hundreds more operating hours.
What Are the Benefits of a Hydraulic Fluid Flush?
Routine heavy-duty equipment maintenance includes periodic hydraulic flushes designed to remove contaminants, such as water, air pockets, sludge, and degraded hydraulic fluid.
While checking hydraulic fluid levels can help ensure the machine has enough fluid to operate, a flush prepares the equipment for new fluid. In addition to preventing costly downtime and unscheduled repairs, hydraulic fluid flushes help maintain the efficient and safe operation of the machine, improving its performance and longevity.
When Should You Perform a Hydraulic Fluid Flush?
Most heavy-duty equipment gets a hydraulic fluid flush as part of the break-in procedure. Machines must typically pass a certain operating hours milestone before the flush occurs.
However, additional flushes thereafter depend on the following:
- Manufacturer’s recommendations
- System usage and operating conditions
- Hydraulic fluid condition
When a machine is brought back into service, it’s a good rule of thumb to perform a hydraulic fluid flush to ensure no contaminants that may have made their way throughout the system remain there.
If equipment has performance issues or the operator or maintenance crew observes contaminants, such as sludge or antifreeze, in the fluid reservoir, schedule a hydraulic fluid flush immediately.
Lastly, hydraulic fluid flushes are often done after significant repairs or before switching to a new type of hydraulic fluid.
How To Flush Hydraulic Fluid: Step-by-Step
Unfortunately, flushing the hydraulic fluid out of a large piece of construction equipment or any other heavy-duty machinery isn’t as easy as changing the oil on your car. Instead, you’ll need to follow strict procedures to ensure the flush leaves behind a clean hydraulic system.
Review the steps below before you begin a hydraulic fluid flush.
1. Drain the Old Hydraulic Fluid
Before draining the old hydraulic fluid from the system, ensure it’s at operating temperature, which is typically between 140°F and 176°F.
Ensure that the hydraulic fluid evacuates the entire system, including cylinders, reservoirs, accumulators, lines, and filter housings. As the fluid drains, replace the filters.
2. Clean the Hydraulic Fluid Reservoir
Clean the fluid reservoir using a lint-free rag to prevent any more contaminants from entering the system. Wipe away any sludge, deposits, or paint in the hydraulic fluid reservoir.
Although this step may seem simple, it’s vital to ensuring a contaminant-free hydraulic system.
3. Flush the Hydraulic System
Begin flushing the system by introducing a lower-viscosity hydraulic fluid than what you’ll keep in the system after the flush is complete.
In addition to having a lower viscosity, the fluid should also have a Reynolds number between 2,000 and 4,000. This number describes the fluid’s propensity for turbulence, which is vital to dislodging contaminants.
With the hydraulic system full, stroke the valves to flush the old fluid from them. Then, drain the fluid while it’s still hot. Replace the filters once more before inspecting and cleaning the hydraulic fluid reservoir, again with a lint-free cloth.
4. Fill the Hydraulic System With Fluid
Once you’ve drained the cleansing hydraulic fluid, it’s time to introduce the fluid that will remain in the machine. Fill the system up to 75% before bleeding and venting the pump. Open the bypass or pressure relief valve to allow air to escape the system.
Run the pump for 15 seconds, then let it sit for 45 seconds. Repeat this process a few times to prime the pump. Then, run the pump for one minute, let it sit for another minute, and then repeat the process, but this time for five minutes.
Start the pump again and move each actuator, ensuring the fluid returns to the reservoir before proceeding to the next actuator. Once that’s complete, shut down the entire system and check the fluid levels. If the level drops below 25%, refill it to the 50% mark.
5. Ensure Hydraulic System Functions
Run the pump in five-minute intervals, ensuring the reservoir fills to 75% each time. Bleed the air from the system after every shutdown. Failure to do so can cause the hydraulic pump to cavitate.
Complete the same step again, this time for 30 minutes. Bring the system to normal operating temperature, shut it down, and replace the filters. Inspect the hydraulic fluid reservoir for any signs of contamination; if evident, flush the system again.
Run the hydraulic system for six hours and repeat the inspection and filter replacement process. Gradually increase the run time to ensure the hydraulic system and machine function as expected.
6. Carefully Monitor Hydraulic System
After completing a hydraulic fluid flush, closely monitor the system to ensure no contaminants remain. To double-check the cleanliness of the new hydraulic fluid, sample the fluid directly from the machine to request an oil analysis.
If the hydraulic system flush wasn’t successful, you may need to look into other methods for removing contaminants. Standard techniques include using caustic chemicals, manual tools, or charged particles.
You can also cycle the hydraulic fluid between hot and cold temperatures or reverse or pulsate its flow to achieve a similar effect.
Supporting Key Maintenance Intervals With High-Quality Products
Strict care and maintenance keep heavy-duty machines and company owners in business, regardless of their job duties. The experts at Cadence know that without superior products built for similar conditions, entire industries would be at risk.
Call us at 336-629-2061 to discover how we’re committed to delivering value at every turn for you, your equipment, and your customers.
Sources:
Cavitation Flows | University of Minnesota Fluid Mechanics Lab
Hydraulic Fluids | Engineering Library